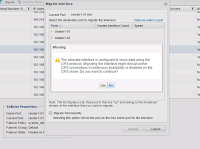
Aggregate relocation operations take advantage of the HA configuration to move the ownership of storage aggregates within the HA pair. Aggregate relocation occurs automatically during manually initiated takeover to reduce downtime during planned failover events such as nondisruptive software upgrade, and can be initiated manually for load balancing, maintenance, and nondisruptive controller upgrade. Aggregate relocation cannot move ownership of the root aggregate. (Source: Netapp site)


The aggregate relocation operation can relocate the ownership of one or more SFO aggregates if the destination node can support the number of volumes in the aggregates. There is only a short interruption of access to each aggregate. Ownership information is changed one by one for the aggregates.
During takeover, aggregate relocation happens automatically when the takeover is initiated manually. Before the target controller is taken over, ownership of the aggregates belonging to that controller are moved one at a time to the partner controller. When giveback is initiated, the ownership is automatically moved back to the original node. The ‑bypass‑optimization parameter can be used with the storage failover takeover command to suppress aggregate relocation during the takeover.
Command Options:
| Parameter | Meaning |
|---|---|
| -node nodename | Specifies the name of the node that currently owns the aggregate. |
| -destination nodename | Specifies the destination node where aggregates are to be relocated. |
| -aggregate-list aggregate name | Specifies the list of aggregate names to be relocated from source node to destination node. This parameter accepts wildcards. |
| -override-vetoes true|false | Specifies whether to override any veto checks during the relocation operation. |
| -relocate-to-higher-version true|false | Specifies whether the aggregates are to be relocated to a node that is running a higher version of Data ONTAP than the source node. |
| -override-destination-checks true|false | Specifies if the aggregate relocation operation should override the check performed on the destination node. |
CLI:
Aggregate name - HLTHFXDB1
Node1 name - cluster1-01
Node2 name - cluster1-02
Now create aggregate on node2, then relocate to node1 from node2,
Create a aggregate HLTHFXDB1 on node cluster1-02,
Check the newly created aggregate using aggr show command,
Now relocate the aggregate from node 2 to node 1,
Now HLTHFXDB1 relocation is done, check the status using aggr show command,
That's it :)


